Showing posts with label lap quilt. Show all posts

Tuesday, January 30, 2018

Quilt Reveal: Adinkra


My latest finish is Adinkra.


I took it outside to photograph since the sun is shining, but the pictures still came out dark and I had to correct them with the photo editor.  They are pretty close though.


I thoroughly enjoyed making this quilt. It was fun to make the blocks once a month. The blocks were easy to applique and the anticipation for the next block was fun.

The economy blocks had a problem with the size, but that made it easier because the sharp points were guaranteed.

As you can see in the picture above, even the join I had to make in the border worked well. The top of the head seamed nicely with the body on the next piece.

The doodle quilting was freeing and went on smoothly.  The fabric is busy enough that the flaws, if any, are easy to ignore.

Even the binding went on well, with four sharp miters in the corners.


Quilt stats:
size:  44" x 44".
pattern: 2016 BOM by Debby Kravotil. Thank you so much Debby!
fabric: variety of African fabrics, most of which are metallic
quilting: free motion echo stitching around motifs, doodle stitching throughout border and remaining blocks
what I learned:
  • Expanding the definition of what "matches". This quilt has lots of combinations I wouldn't have thought to use together, but my limited selection of fabrics made me stretch, and I think the result is fabulous.
  • I really enjoy combining applique with piecing. The applique and the quilting were my favorite parts.
  • When I first learned about free motion quilting, I thought it looked like doodling on fabric, but then I learned rules about not crossing lines, and saw lots of videos about proper quilting designs, and breaking the quilt into sections and choosing a different design for each section and lost the fact that I could truly doodle.  I truly doodled on this quilt and it was exhilarating!

I plan to make up a label that explains all the symbols on the quilt.

Linked to:
WIP Linkup at Silly Mama Quilts

Tuesday, October 31, 2017

Quilt Reveal: Tile Quilt


I was thinking about what to gift my sister for her birthday when I remembered that I had gifted her the tile quilt top last year, but hadn't finished it!  Oops, time for some emergency quilting!

I had been thinking about quilting in the ditch to make the squares look more like tiles, but thought that slightly beside the ditch would be better to look like the grout. I had originally thought to stitch on both sides of the seams, but these squares are fairly small, and there are a lot of them. I'm not really sure that they would be necessary since the seam itself is one side of the grout and the quilting could be the other side. I used a slightly darker thread so the grout lines would show.

Another option, which I obviously discarded is to quilt motifs on the quilt, to take full advantage of the fact that it is a quilt and not tiles.  I really couldn't think of a motif or set of motifs to add.

I had a dream that I quilted all sorts of motifs on the quilt, like graffiti. I pictured some graffiti on an American flag that I must have seen in the 80s or thereabouts  I had already started quilting and there is  no way I could think of enough motifs to add to do that, but this dream did really help me relax in quilting this. "She's just lucky I'm not graffiting all over the quilt."


 The quilting is about an eighth of an inch away from the seam, which is not a normal width in quilting.  Every time my mind wandered to thinking about something else, like "is the path clear?", "do I need to remove more safety pins?", "is the quilt flat on the table and not dragging?", I would subconsciously switch to either quilting in the ditch or a quarter of an inch away, and I would have to veer back to the right space, sometimes over-correcting and needing yet another adjustment.  I think I did this often enough to make it look like the variation was normal and expected.  This picture above this paragraph has the truest colors, and you can see the tile-like design in the cream fabric.


The party was at my house so I was busy cleaning and working, and the party was in the evening, so I  didn't get a good picture of the whole thing, but this gives you a general idea.

Islamic Tile Quilt made by Shasta Matova
Apparently I didn't get a good picture of the quilt top either, but here is a picture I showed last time of the whole quilt top.

This quilt was a joy to quilt.  Part of it was my relaxed mood I mentioned above.  But part of it was also the batting. I used a new batting from Joanns that I got on sale this year or last. I usually use Warm and Natural. I think this one was called Soft and Bright or something like that. It is super soft and seems to have less scrim than Warm and Natural. Without actually looking at the labels, I would imagine that this batting would be really good for people who like a lot of quilting in their quilts and yet still want a soft look.  Another part of it was the new Sew Steady table I got shortly after starting quilting on this quilt. I'll review that after I've played with it some more.

While I was binding this quilt, I watched YouTube videos on junk journals, bullet journals and scrapbooks.  I thought about new quilt ideas.  But I've had so much fun quilting this quilt and the last one, that it might be time to quilt something else!

Linked to:
Let's Bee Social

Friday, December 26, 2014

Improv Quilt Reveal


Sherri Lynn Wood's book The Improv Handbook for Modern Quilters: A Guide to Creating, Quilting, and Living Courageously is available for pre-order on Amazon.  It officially comes out March 17, 2015.  What this means is that I can now reveal the improv quilt I made earlier this year. Forgive the photo heavy post. I've had a lot of time to take pictures of this quilt!

As I said earlier, I was one of the testers of one of the patterns in this book.  My quilt didn't make it in the book unfortunately, but I appreciated the opportunity to participate. This quilt was all about rhythm.  The score of this quilt is rhythm. I kept my palette very simple with just black and white. I wanted an accent color. I was debating between red and green, but my daughter recommended purple, and so I went with that. I think it was the best choice.


We were to make striped fabric by cutting the fabric into strips free form and then make a quilt out of it.  I deliberately kept my strips from being too straight, not that I would have been able to cut straight lines without a ruler.

I cut the strips in half so I could get variety in mixing and matching.  Then, I sewed them together into stripes of five fabrics.  I made some deliberately dark, some deliberately light, and some medium. I think I had five or six rows.
 I cut them into squares.
 Then I cut them in half to make half square triangles.
I mixed and matched the HSTs so that the would meet at an angle and look like L's.  I sewed them together and stacked them up.


I tried to keep it improv, so I didn't do too much arranging, but I did put them on the design floor to see how it looked. Also since I used the floor in a room that did not have the sewing machine, I was able to keep it improv and free form. I sewed blocks together to make rows.  Sometimes I would have to add more fabric to get the blocks to fit together since they turned out to be different sizes.


After I had all the rows together, I had to try to make the rows fit.  This meant I added more fabric where there were empty spaces.  I wanted a bigger quilt, so I tried to add more than trim away to get them to become the right size.

Zeus helped make sure the quilt didn't escape while I was working on it.


After all the rows were joined, I had to add nips and tucks where the quilt was lumpy.  I did this several times, putting the quilt on the floor to make sure it was as flat as it could be.


Squaring up the quilt was the hardest part, since there wasn't a single line that was straight that I could use. But I folded the quilt and cut to the smallest space, but sometimes I added more fabric to help make the difference.  I quilted it with straight lines using a squiggly stitch my machine provided.


©
Shasta Matova


As you can see, most of the quilt is composed of half square triangles that were joined at an angle to form a box shape.  There is one nine patch, and two blocks that were joined straight together instead of being made into a box shape.  I did this deliberately for an added improv touch.

I like almost everything about this quilt. It isn't conventionally pretty, but I like it.  The dark spot on the bottom right (second to bottom row) where the nine patch and the maverick block run together bothers me sometimes, but they do add to the improv look of it.


1 Improv Quilt
©
Shasta Matova

My sister and I took a couple of my quilts to photograph on some construction equipment.  Now I can finally show these to you. Which one is your favorite quilt walk photo?


2 Improv Quilt
©
Shasta Matova

3 Improv Quilt
©
Shasta Matova
4 Improv Quilt
©
Shasta Matova

5 Improv Quilt
©
Shasta Matova

6 Improv Quilt
©
Shasta Matova

7 Improv Quilt
©
Shasta Matova

8 Improv Quilt
©
Shasta Matova

9 Improv Quilt
©
Shasta Matova

10 Improv Quilt
©
Shasta Matova

11 Improv Quilt
©
Shasta Matova

12 Improv Quilt
©
Shasta Matova

I hope you enjoyed seeing this quilt reveal. I have waited anxiously to show it to you.

Friday, October 3, 2014

Take Your Quilt on a Walk Day

In my last post, I showed you a quilt I surreptitiously photographed on some city equipment.  I had invited my sister to come serve as my bodyguard or cohort in crime, but she was busy.  The following day, she called me to see if I still wanted to take that photograph walk.  Of course I said yes!  This time I brought two quilts.  I chose these two because I thought their lines would look good with the white lines on that cargo bed, but also because these two quilts haven't gotten properly introduced.  I brought the improv quilt, because I only got a few photographs of it the previous day, and a rail fence quilt.   I can now freely show you the rail fence quilt in its full glory!  Which one do you like the best? Why?


Sunday, October 2, 2011

Simply Squares

how to make gif

Why are you seeing photos of a quilt that you thought was finished way back in May?  Well, it is a long story.  When I finished the Celebrate quilt, I updated my spreadsheet to mark the finish date, but I also tried to add a column to figure out the average amount of time each quilt takes.  It didn't work out - since there are estimates of dates and ranges in there.  Then, I tried to sort the spreadsheet, but used the wrong range, so the sort was all wrong.  I didn't save the spreadsheet and just quit.  I didn't remember that I hadn't saved the updates.


Anyway, yesterday, I was looking at the spreadsheet to see how I was doing, what I wanted to work on, and I noticed that the Celebrate and Simply Squares quilt did not have finish dates on them.  I looked on the blog for the finish date for Simply Squares, and all I found was a note that I was working on the binding in May.  No quilt reveal!  I know the weather was bad and I wasn't able to get a good picture, but we've had good weather days since then!


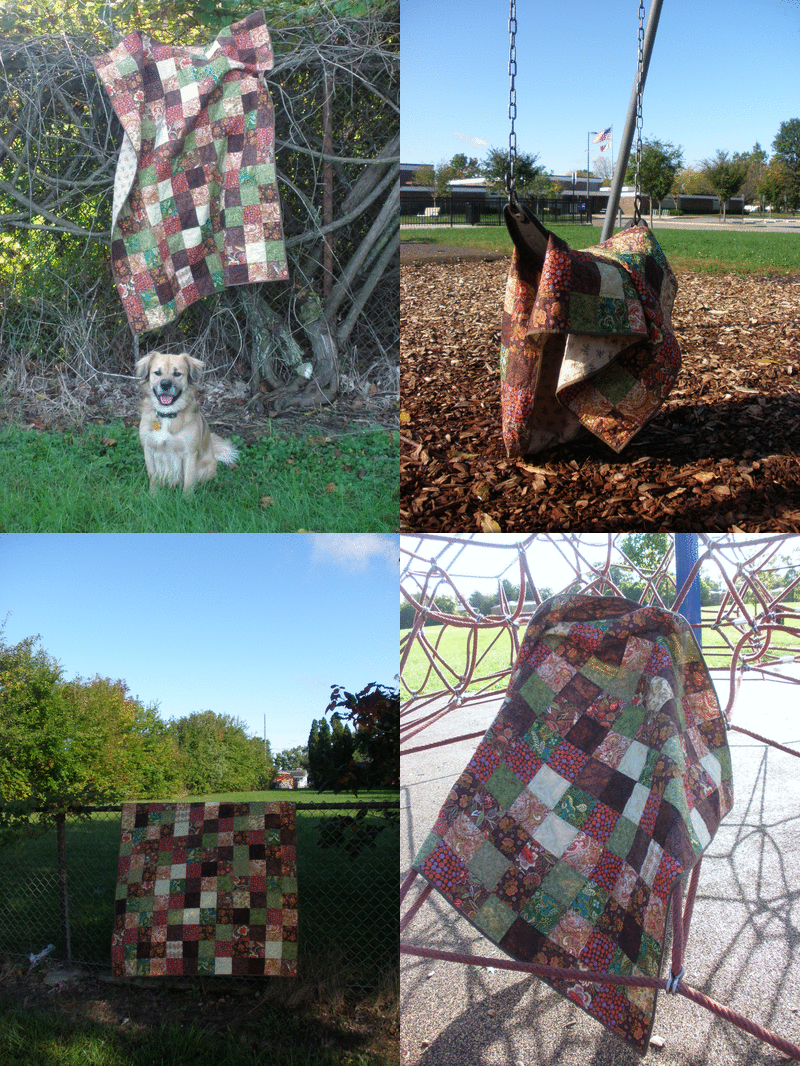
I decided to remedy the situation by providing a belated quilt reveal.  I took the quilt along for our daily walk.

Which photo do you like the best? I added a poll in the sidebar for fun.  Please leave a comment to let me know what appealed to you about the photo(s). This will help me take better photos of other quilts.

Tuesday, June 22, 2010

A finish!

First off, sorry about the lie in the next to last post. I told you I would be showing you the treasures in my treasure box, and I sneaked in a book review. Deadlines, you know how it is. Okay, so the first thing out of the treasure box is a Quilt for Kids quilt. I finished it. And it is free motion quilted. I didn't want to take a lot of time deciding on a quilting design, only to find out that I couldn't get the free motion to work anymore, so I decided to meander. The pictures for this quilt wound up with the quilt show quilts. You know what this quilt and the quilt show quilts have in common? It is finished! Be sure to visit AmyLou's blog to see what other crafters have been up to this week.

Friday, January 15, 2010

African Circles

I just love the Quilt Reveal label. I put it on this post before I even started writing or adding pictures. This is my first finish of the year, hopefully the first of many. The binding is done on the African Circles quilt. This quilt is very different from my normal style, and I didn't even think I had one, and took me out of my comfort range. The African fabrics are busy, and I added a background that was also busy, but hopefully tames and brings them together. I know that the circles are arranged symmetrically, which wasn't the plan, but I had to put them in a pleasing arrangement, and symmetry is pleasing to my eye. Just as a reminder, I used an old CD as a template, and the circles are attached raw edged with a zigzag stitch. They are also quilted with a zigzag stitch around each circle. According to some sources I've read, Africans make their quilts busy to avoid evil spirits from getting into them. Somehow to my logic, it seems that busy quilts would trap the evil spirits in a quilt, which is still somehow a good thing. In either case, I added some quilting in a zigzag pattern on the circles on the side for the evil spirits. They may see that they will be treated like pinballs in this quilt, and avoid entering. The border also has zigzag stitching, to create a diamond pattern. Although it didn't need more quilting, since the circles are quilted, it did look like it needed more quilting design, so I looped around the middle circles. It was hard, because I wanted to make sure I wasn't causing any lumping as I created the loops. I didn't, even though the photo shows a crease. I'm not sure I like the circular quilting. I might take it out and add diagonal lines joining some of the circles. I'm just not sure the diagonal lines would look any better, and not sure it would make an overall difference in the quilt. Please let me know what you think. For now, I'm calling it done, and reserving the right to redo the quilting. I've added this blog post to Blue Cricket Design's show and tell Wednesday, and Amy Lou's Sew and Tell. Feel free to click on the links to see what other crafters are up to.

Wednesday, September 2, 2009

A Quilt!

After the strip tease in my 110 post, I am happy to announce that I am finally finished with my quilt. It is a fraternal twin to one I made earlier. What shall I call it?

It started as a kit that I received on a Superbowl Sunday sale at the LQS. The fabric was already cut in strips. They showed me the quilt - it was made out of rectangles, but I immediately decided that rectangles were boring, and that triangles would make the quilt look more interesting. This was the time before I realized that simple quilts were beautiful too. This was also before jelly rolls, and I didn't have a large scrap collection, so I didn't have a good place to store strips of fabric. I decided to make a quilt right away. I made the half square triangles. I arranged and rearranged. I decided I would rather make two small quilts instead of one. It might have been because it is hard to decide which arrangement to choose, but it also might have had to do with the difficulties of quilting a big quilt in a machine. This looks more like baby quilt material to me. The other quilt has been finished for a long time, but this one has been languishing. I bought fabric for the border, because I used all the excess fabric in the other quilt. After my failed attempt at making the Blushing Bride quilt simple, I decided I could do simple with this quilt. There is simple quilting of diagonal lines both sides of the seam, to accentuate the subtle zigzag pattern. I decided to do a scrappy binding. I used two of the pieces that were in a scrap basket at the same LQS at another Superbowl Sunday sale. The scrap fabric was purchased by my mother and then given to me. I started doubting using those pieces because they have more orange in them than the rest of the quilt, but I am happy I stuck with it. The rest of it came from the fabric previously chosen for the border. And to follow suit with the other bloggers who make their quilts look so pretty, I present lots of angles and lots of views. I didn't wash the quilt before photographing, which the other bloggers do. I think the washing makes it look better, but washing, this makes it look used instead of new, and if I am thinking about giving a quilt to someone, I don't want them to think I am giving them used stuff. I know I am going to have to change my mindset about it. Only a couple of my quilts have ever been washed. Edited to add: It is approximately 39" x 45". I think it would work well as a baby quilt.