Showing posts with label red quilt. Show all posts

Saturday, February 22, 2025

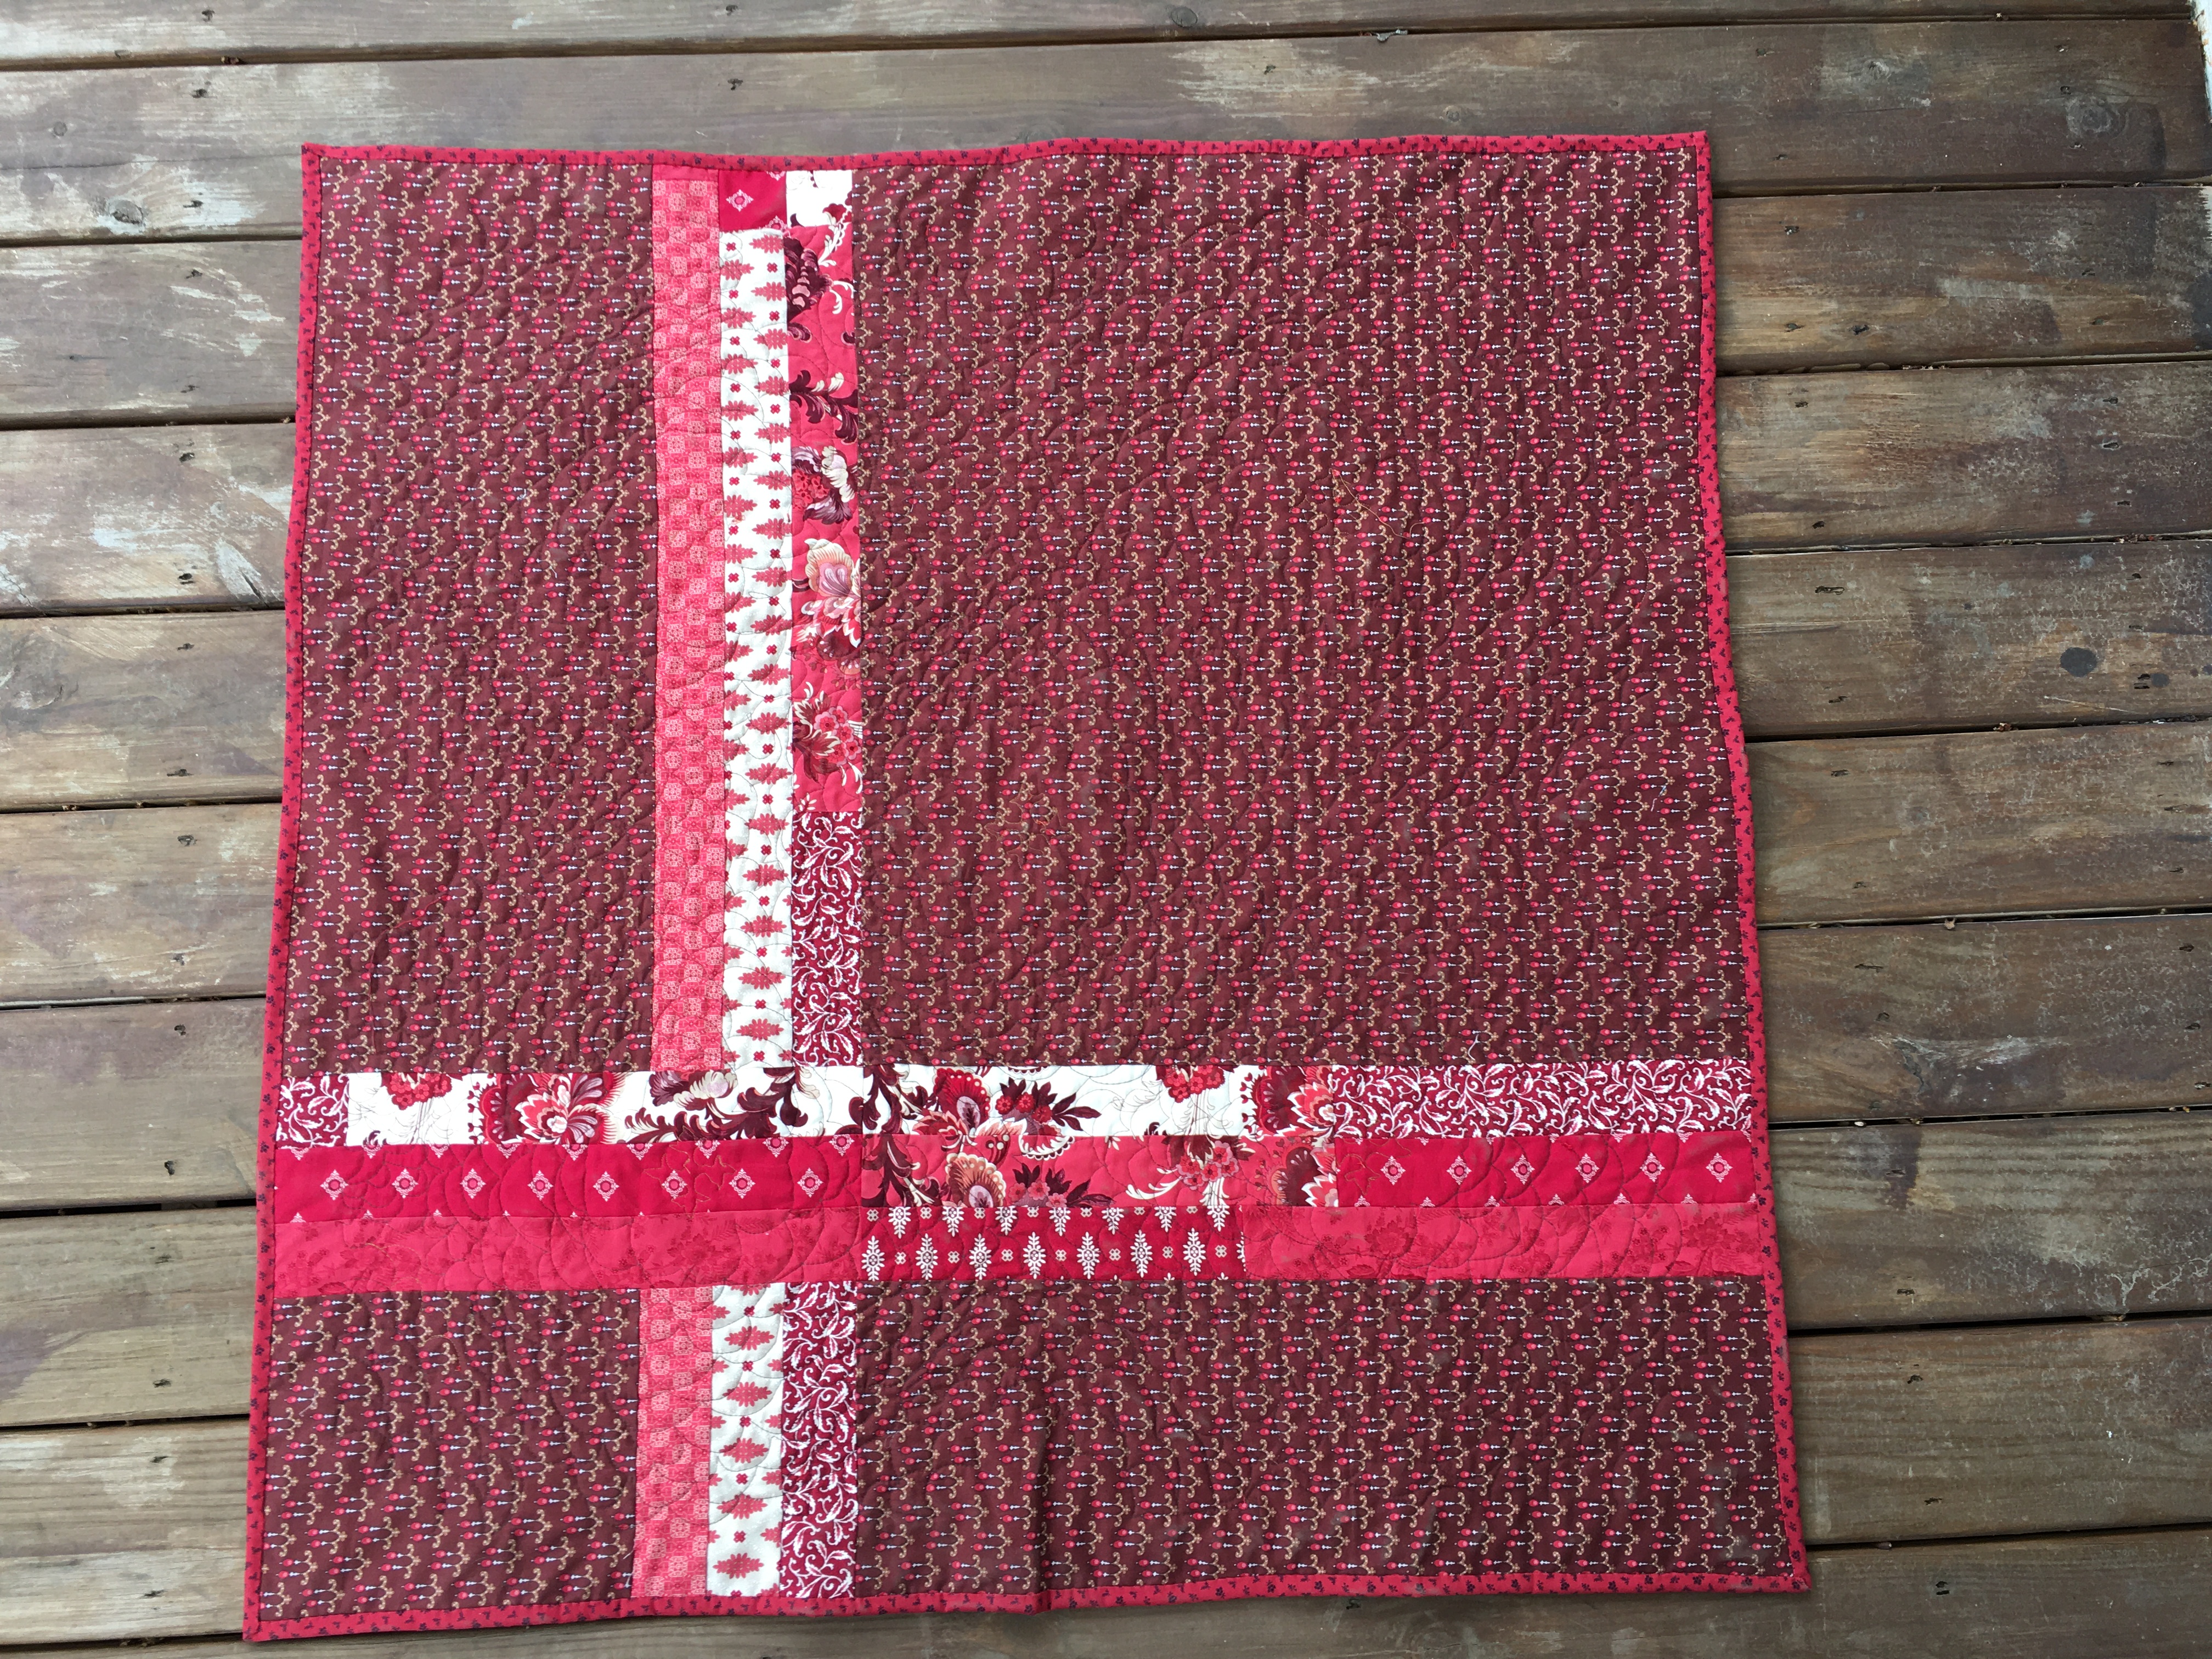
Quilt Reveal: Ruby Buttons

 I managed to make this week's Project Quilting Challenge submission early. The deadline is Sunday at noon central, but here it is, Saturday evening, and I already have the quilt done.  It is also a proper quilt with lots of pieces, so not a small coaster.

The theme of this week's challenge is to make something that is the color of your birthstone, My birthstone is ruby, so it was easy idea for me to make a quilt for my red and white quilt collection.


I wanted to make a quilt with little red squares. I sewed them together in strip sets. They remind me of fabric covered buttons.


This quilt reminds me of the small squares in the Maximum Minimum quilt.


I quilted it with some straight lines, thinking of pinstripes, but looking at it, it looks more like button placards, which makes them look like buttons even more.


Although the other quilts for this challenge were made by birthing quilts, this quilt needed a binding. In order to make it quickly, I machine stitched the binding to the back, folded it over the front, and sewed it down using a serpentine stitch.


I am really happy that I get to submit this quilt on Saturday and not have to worry about whether I will finish it before the deadline.

Monday, April 3, 2023

Quilt Reveal: Boundless


Here is the formal introduction of Boundless. This quilt was started as a part of the Dust Off An Old Book blog hop. I started almost a month before my post day, but I ran out of time. I presented an unfinished quilt on my blog hop day.

I started with a jelly roll, some background fabric, and the book 100 Quilts. Although I could make a bigger quilt, I wanted to have a quilt that is a good size for my rotating display behind my couch.

I added some applique in the diamonds because it was a a fast and easy quilt to make and I wasn't finished working on it. It adds a little extra to make my quilt a little different.


Since I like to put interesting dates on quilts, when I realized it was April 1st, I decided to make a little push to get it done on 4/1/23.


Sunday, March 19, 2023

Quilt Reveal: Fear of the Missed Deadline

 I was going about my merry way, planning today's post to say I have been quilting for the last two weeks but have nothing to show for it. Just cutting some scraps, organizing the sewing room, finishing quilting Boundless.


I even figured I could show you my library stack to keep the post from being too boring. I went to the main library recently and gathered these books.


Then I thought, is Project Quilting over? And sauntered my way to the website to find out. Nope, there is one last project, and it is due in three hours! I can't make a quilt that fast. I already used up the last of my scrap in last week's project.

Then I read the challenge post. It is about conquering a fear. Seriously?! It is daring me to make a quilt in three hours. Very tricky, people. Can I make it?

Step aside, I have another emergency quilt to make. Anyone who complains about the lack of vacuuming can blame the Kim and the Project Quilting people.


To make it quickly, I raided the Spare Parts box. That is where I put my orphan blocks that are leftover from other quilt projects. Since my project last week used leftover from another project and I got away with it, I decided to push the rules even more. What are they going to do, fire me? It is the last project of the year.

I figured I could use these pieces and fill in with the leftovers from the Boundless quilt and the box of scraps I am currently cutting for my scrap quilt.


I decided to just use the pieces based on their size and not worry too much about anything else. If it fits, that is where it sits.

I even took a break to make a scrappy lunch - throwing whatever I could find in the kitchen together to get it done quickly.


Ta-da! And because of the deadline, there was no time to take a lot of in progress pictures.


I had to edit this post to show you how close I came to missing the deadline.


Friday, July 23, 2021

Quilt Reveal: Red and White Op Art Quilt


I present to you my mini quilt of the month. It is based on a class I took from the Dayton Art Institute about Op Art. I decided to translate it to cloth. I took red fabric and cut out the parts I wanted to be white.

I had tried to add blue underneath, and didn't really like the way it looked so I took out the blue. But since I quilted it days after I posted it on the blog, Tanya said she did like the blue.  I thought about it, and remembered that I did like the blue when I first added it, but then I added too much. I didn't want to take too much time thinking about where to add the blue, but when I got to this section, I decided a touch of blue would be good.


Another thing that happened is that I dreamed that I cut a fringe from the unquilted red fabric. While I think about quilting all day long and have daydreams about quilts, I rarely dream at night about quilts. Cutting a fringe wasn't presented as an option - it was something I was actually doing. (That was really all there was to the dream - my dreams are as exciting as my days). So I cut the fringe during the day and then I cut some fringe out so it looks like I made the quilt by weaving.
 
It's a dream come true, y'all.
 
I turned the white border to the back and wanted some more red as an outline so I secured the "binding" using a running stitch with red crochet thread.

 
Here it is again in a different position. It finishes at 14 1/2" x 18".

Thursday, February 20, 2020

Quilt Reveal: Color It Red


Welcome to the Color It Red blog hop!

 I really like red and white quilts so for my Blog Hop day, I was originally going to finish an old project that had red in it, but decided to make a brand new red and white quilt. Starting new quilts are so much fun, and since I have an excuse, I may as well take advantage of it!


My quilt started with some red yo-yos I made for my yo-yo coverlet. I decided that the red yo-yos were too bright for my coverlet.

If you are new to my blog, as way of background, I am making a yo-yo coverlet to replicate an antique one I saw when I was in New Orleans. Welcome, and feel free to look around once you are finished with this post. I make lots of different types of quilting and other craft projects. If you are a regular visitor, I am sorry for bringing up the coverlet yet again. Consider this post to be a vacation from that coverlet. I promise I won't mention it again in this post.


Instead of sewing the the yo-yos together to form a rectangle, I decided to use them to surround a red and white quilt. I thought a silhouette would make for a simple applique, and a profile portrait would make for a more interesting portrait. I looked up some silhouettes on the internet and found a silhouette profile with flowers in the hair. I thought that was a great concept for my quilt.


I used dots fabric to resemble the dots portraits in old newspaper articles and books before photography. It's a little reference to my genealogy addiction.

I traced it, but made lots of changes in it to make it my own. I put fusible on the back of the fabric and cut out the shape and fused it to the background. I then free motion quilted and bound the quilt. I threw away the rest of the fusible so I don't ever accidentally use it again.  It gummed up the needle and made it very difficult to quilt.

I think it looks great as it is without the yo-yos. Some of the dark splotches in the photo above are due to my lazy job washing the washable marker out. Some of it is winter lighting.  I am sure it will be fine after a second wash.


When I quilted it, the face received dimension on its own so her jaw line is pronounced and her eyes are set in.  I really like that. I added a layer of batting behind the hair so it would also stand out. It made a small difference. I used permanent fabric markers to make the eyes, nostril and lips. The  shadow under the eye is a mistake but I think it makes the face more interesting.


Since the point of the quilt is to use the yo-yos, I added them around the quilt as planned. I think it is good practice for future use. You know, in case I ever need to know how to join yo-yos.

The inside quilt is about 6" x 8" and with the 2 inch yo-yos, it is about 10" x 12".  By the way, did you notice that the portrait uses a different fabric than the yo-yos? I was happy to find that I had two different dot fabrics in the same shade of red.

Thanks for visiting me. I hope you enjoyed your stay. You're welcome back anytime. Feel free to look around and see what else I've been up to over the last couple decades. There are links in the sidebar to help guide you to whatever interests you. When you are done here, visit the other participants on the blog hop.


February 17th

February 18th

February 19th

February 20th
February 21st

Also linked with: Beauties Pageant

Thursday, January 31, 2019

Quilt Reveal: Vintage Holiday


As you know, I have been working on the Vintage Holiday mini quilt. I missed the deadline for Project Quilting, and decided to take my time and hand stitch the binding. It looks much neater when I hand stitch because I don't have a lot of practice machine sewing the binding.


 I finished putting the binding on Vintage Holiday last night, and was very proud of myself for getting it done before the end of the month. After all, it is only the 30th and there are 31 days in January. It was even done way before midnight so I was more than a day ahead. It turns out everyone else was finished before me. They apparently don't know that when something is due on the end of the month, that means it should be finished at exactly 11:59 p.m. I couldn't post last night because I didn't want to show nighttime pictures of my quilt. My pics look bad enough during the winter day. Anyway, here is my grand reveal.

So here it is the end of the month
and time to share 
 my monthly mini challenge

Vintage Holiday was started January 21 and finished January 30. It uses solid red fabric and two white prints. The binding is a slightly textured red print. The pattern comes from Christmas Quilts and More magazine. I used an embroidery stitch to stitch down the red background and fused the applique down.  I sandwiched the quilt, and stitched all the applique pieces down with free motion quilting. I also outlined each of the applique pieces to make them stand out.  I realized that there was a blank space on the right side, and instead of making another sled, I decided to add a dog.  So now, this quilt fits in the dog quilt category as well as the red and white, the winter, the small quilts, and the holiday categories.

The red background is quilted with windy swirls and the white background has downward sloping lines to resemble a hill. I had a great time quilting it.


I woke up one morning, realizing that the dot under the O in Season's was supposed to be the dot for the I.  I was disappointed in myself for not following the instructions or at least thinking it through, because if I had switched those two O's, they would look more like a snowman. When I looked at the pattern, it looks like I did follow the instructions. In the unlikely event I ever make this quilt again, I will move the word Seasons so that the i is properly dotted. (It is unlikely because I don't like to repeat what I make, not because I didn't enjoy making it.)


I added a lace trim just over the  top because the lace wouldn't show over the white so there was no point in it. I also added a lace garland over a tree as a special treat for those who took the time to look closely at the quilt. In these pictures, the lace on the tree looks too white. I might have to find a way to tea stain it.


I added a corner triangle on the back for a label. The backing uses the same white as the trees.  I even went outside in the frigid temperatures to get you this and the picture at the top of the post.

Linked with:
Friday Foto Fun


Sunday, November 12, 2017

Quilt Reveal: Red and White Tree

Two quilt reveals in a row!  I am on a roll!

The last time you saw this quilt, it looked like this:


This is a third generation of the red and white quilts, and I was pretty sick of the red and white by now.  I've already learned that the fabric looks pink from a distance and doesn't even play nicely as a red and white quilt, so making a third one of these was irritating me.  Whoever made up the arbitrary rule that I should keep making red and white quilts?


I looked at the package I won, and back at this quilt, and decided the green would look quite nice as apples.  I know you and I both thought that the red could be leaves or apples, but we were both wrong; the apples are green. Since this was supposed to be a scrap quilt, I found some other scraps that might work and brought them downstairs. (Yes there is a blue apple and yes I did that on purpose.)


I added a sun to the top left corner, because all of the drawings I made as a child had one of those. I didn't color very dark as a child so the fact that this sun isn't very bright is fitting.


We had a power outage and I decided to work on this quilt by candlelight. I did not get a chance to audition the fabric, but I kept telling myself "You have a red tree. Does it really matter what color this is?" The eyes are big because I didn't dare to make them any smaller. There is no way I would have found them if I dropped them. I like how the baby bird looks like it is about to fly. Maybe it is a flying lesson. Or animatedly telling Mama what happened at school.


I added the grass, and teased it  so it would fray.  I had to add a doggie. It doesn't look like Zeus, but it does look like a dog. I put him on top of the grass, because that is what I would have done in kindergarten.  This dog is so light, he walks on blades of grass.

I used some tulle to cover the quilt before quilting.  The gluestick was old and the glue is washable and I wanted to make sure everything stayed properly in place. I was worried that the glue might stick to the needle and make it difficult to quilt, but it didn't. The tulle makes the blue look like denim from a distance.

 
 I made cloud-like scribbles in the tree as I would as a child. I also added diagonal lines across the background to represent the rays of the sun.  Let's see, I have apples, birds and a dog on the quilt. A, B, D.  It seemed like I needed something that started with the letter C. I thought "color" might be too obscure.  I didn't want car or cat, so I had to look in the dictionary for other C words.  I added a clover.  While I had the embroidery thread out, I added other little bits around the quilt too, which you can see in the pictures throughout this post.


And in case that doesn't look like clover, or think shamrock instead of clover, I added a little carving in the tree.


Here's the finished quilt. I used the same apple green fabric for a wide binding. I wound up having a seam in the bottom left corner, making it bulky, but I think it is okay.


Here it is with its parent.The grandparent quilt had to be sent to the nursing home because there wasn't enough room for it.  This quilt was a lot of fun to make from start to finish.

Linked to:
ScrapHappy Saturday 
Let's Bee Social

Thursday, November 9, 2017

Quilt Reveal: Red and White Presents

Since I had such a good time quilting my last quilt, I decided to go on and quilt another one. Here's my finished red and white presents quilt. The lighting isn't good in the fall/winter, but at least you can tell that it is finished.

 
Unfortunately this one was not fun to quilt.  I used free motion quilting, and my biggest mistake was not planning a continuous line.  I knew I wanted to do loops in the inside squares, and a bigger loop in the long rectangles, but my plan for the remaining sashing involved traveling back along existing lines, and there really wasn't a good flow from one space to the next. 


(I obviously wasn't trying to match points on this quilt. The center square is half an inch finished.) 

There were other issues too. I kept running out of bobbin.  There is some kind of problem with the machine, and the bobbin fills only about half way.  I have a separate bobbin winder and my two broken machines upstairs have bobbin winders that work just fine, so I don't have any excuse for not using one of those, but I didn't think a small quilt like this would need that kind of effort.  Then I ran out of spool thread too.

I also had other interruptions - some perfectly normal family type stuff, and some bots who are worried about the interest rates on my credit cards.  When I was working on the tile quilt, after an interruption, I would come back and say "now where was I?" and resume quilting. With this quilt, the interruption would lead me to say "let me turn this machine off and do . . . " something else. 

These interruption meant I wasn't able to establish a good rhythm flow to the quilting, and the path changed from one session to the next. I don't think any of that is obvious in the finished quilt though.


Here it is, a second generation quilt next to its parent.

Tuesday, October 31, 2017

Quilt Reveal: Tile Quilt


I was thinking about what to gift my sister for her birthday when I remembered that I had gifted her the tile quilt top last year, but hadn't finished it!  Oops, time for some emergency quilting!

I had been thinking about quilting in the ditch to make the squares look more like tiles, but thought that slightly beside the ditch would be better to look like the grout. I had originally thought to stitch on both sides of the seams, but these squares are fairly small, and there are a lot of them. I'm not really sure that they would be necessary since the seam itself is one side of the grout and the quilting could be the other side. I used a slightly darker thread so the grout lines would show.

Another option, which I obviously discarded is to quilt motifs on the quilt, to take full advantage of the fact that it is a quilt and not tiles.  I really couldn't think of a motif or set of motifs to add.

I had a dream that I quilted all sorts of motifs on the quilt, like graffiti. I pictured some graffiti on an American flag that I must have seen in the 80s or thereabouts  I had already started quilting and there is  no way I could think of enough motifs to add to do that, but this dream did really help me relax in quilting this. "She's just lucky I'm not graffiting all over the quilt."


 The quilting is about an eighth of an inch away from the seam, which is not a normal width in quilting.  Every time my mind wandered to thinking about something else, like "is the path clear?", "do I need to remove more safety pins?", "is the quilt flat on the table and not dragging?", I would subconsciously switch to either quilting in the ditch or a quarter of an inch away, and I would have to veer back to the right space, sometimes over-correcting and needing yet another adjustment.  I think I did this often enough to make it look like the variation was normal and expected.  This picture above this paragraph has the truest colors, and you can see the tile-like design in the cream fabric.


The party was at my house so I was busy cleaning and working, and the party was in the evening, so I  didn't get a good picture of the whole thing, but this gives you a general idea.

Islamic Tile Quilt made by Shasta Matova
Apparently I didn't get a good picture of the quilt top either, but here is a picture I showed last time of the whole quilt top.

This quilt was a joy to quilt.  Part of it was my relaxed mood I mentioned above.  But part of it was also the batting. I used a new batting from Joanns that I got on sale this year or last. I usually use Warm and Natural. I think this one was called Soft and Bright or something like that. It is super soft and seems to have less scrim than Warm and Natural. Without actually looking at the labels, I would imagine that this batting would be really good for people who like a lot of quilting in their quilts and yet still want a soft look.  Another part of it was the new Sew Steady table I got shortly after starting quilting on this quilt. I'll review that after I've played with it some more.

While I was binding this quilt, I watched YouTube videos on junk journals, bullet journals and scrapbooks.  I thought about new quilt ideas.  But I've had so much fun quilting this quilt and the last one, that it might be time to quilt something else!

Linked to:
Let's Bee Social

Friday, October 6, 2017

Red Snowflake - Seven Day Mystery Quilt Reveal


As a part of Finish Fest, I have finished the Seven Day Mystery Quilt, which currently has the creative name Red Snowflake.

I enjoyed every part of making this quilt, even parts that might have been frustrating in the past.  The fabric selection was quick and easy - pick a fabric and a background.  Making the blocks was enjoyable.  Maximum of four easy blocks, with easy directions.  Putting them together was easy and fun, solving a mystery made it more interesting.  The straight line quilting with all its turns was still fun, because I was highlighting the snowflake and looking forward to the free  motion afterwards.  The free motion quilting also moved along easily. I used a generic darning foot and it worked wonderfully. I think I will be using more generic feet with this machine.  The brand name ones are crazy expensive.

Thank you Rose of Threadbare Creations, for this great mystery and pattern.

Presenting it is the hardest part. Besides the fact that it is dark and rainy outside, Blogger didn't want to accept my photos.


Future historians aren't going to know how to take this quilt. Of course they will be looking over and analyzing my work. Some of them will say, "no Shasta didn't make this; she tends to add things to simple modern quilts to make them less modern." Others will say, "yes she did make it.  See this lump? This was made before she learned how to make proper bindings."


This quilt is versatile. It fits right at home with my other modern quilts.


It fits with the Christmas quilts. 


And it fits with the red and white quilts.  I remember saying of my last small quilt finish that it was the biggest small quilt I had made. I don't remember which one that was so I can't compare, but I think this one is bigger. It crowds out the other quilts so there is no danger of it having a permanent place on the bulletin board.

I looked it up. It was the Irish chain.  I'm sure it would look good with that too!


It looks good with the Valentine's Day quilt.

Linked to:

 Scraphappy Saturday. Even though it is red and white, it looks pink from a distance, and has a pink backing.